Pages

Monday, 24 November 2008

Altered Mini Scallop Album


This plain wood mini album can be bought at Spotlight under the brand KaiserCrafts. They have a wide range of mini albums for altering and interesting embellishments for added dimension to your scrap pages.
 Couple of weeks ago, ACE, my acupuncturist (new scrapbooker friend) came to my home to work on this project together. It's meant as a birthday gift for her BFF (best friend forever)! 
So.... I'm into the aged look...with lots of browns and distressing and antique embellishments.... 
She did looked rather aghast at my suggestions.LOL!!....  and so, I was reminded how old I am and how young she is..... being 15 years younger and all..... Alrr-r-r-ight,  I can do young and bright with lots of pinks (bday girl's fav colour)! LOL!! 
She chose the paper for the front and back covers and I suggested the embellishments.... I thought it turned out real pretty! Oh! and we brushed Mod-Podge (Plaid)  over the paper to add a layer of protection over the front and back cover. The added gemstones on the black sticker felt lettering did jazzed it up the quite a bit! Oh, one more thing.... I found that these felt letterings are not easy to use, in that the skinny parts of the letters do break off rather easily and because of the softness of the material, you need to make adjustments to the shape and look of the letters very carefully....


I can do only so much "young" a day .... a-n-d before I knew what was happening I had painted these two pages an olive-ie green... THEN I remembered that I was to do bright cheerful colours...... ooop-sy! BTW, Making Memories Acrylic paints are the best! Love the colours, the finish and the ease of use. You can find them in most scrapbooking shops.


The next 2 pages gotta be PINK! The yellow cut-out are for framing photos and are embossed using my Cuttlebug machine. Ace loves stickers! 
"Uhmmm, Ace, please do not cover the page with stickers.... Yeah, the pink vellum champagne bottle is nice.... YEAH.... use only ONE !" 
Yes, I can be tyrannical sometimes.... SIGH!! 


These next 2 pages are my favourite! I love the blue colour and the whole layout and the scrapbook paper! I found ( she had forgotten that she had them!!) in Ace's scrapbooking stash this gem of a box of Journaling cards from Maya Road. I'm soooo droooling over them!!! The other thing I thought turned out real well was the wood frame. It's also from KaiserCraft and to get the brownish burnt colour; just simply use brown chalk ink to lightly tap-brush over it and then a dark brown to edge the sides..... easy...peasy.... la-di-da!   Don't you find the blue Dew Drops just YUMMY?!


AH! So that's it for now.... actually there are 2 more *pink* pages, but as it's more of a montage of photos, I thought I had better be mindful of their privacy and not post them.....I think Ace had as much fun as I did working on this project.... There's something about working together rather than doing it alone. Firstly, you tend to push each other on to project completion. Secondly, we use each other as sounding boards on what works and then build on each other's ideas. Lastly, you get to know each other better.... Ace is an impatient person, she just want to stick everything down first!! hee! hee!

Friday, 24 October 2008

DOUBLE-POCKET CARD

It's been a while since I've posted..... Was "lost" for a while.... did not have the mood or mind to do any crafting. Perhaps it was because I've been indulging in E-bay. Seriously bad for the pockets and health; sleeping late or waking early to watch my bids!.... Blamed this recent indulgence on discovery of those lovely Stampin Up Stamps! They aren't available here or any online stores, so the only way was to get them off E-bay. I think I bought about 20 (YIKES!) sets.... BUT ; > I'm proud to say that I've not fallen as deep as my other 2 (I better not mention names...) compatriots in craft who had perhaps amassed some 30-40 over (LOL! I lost count and they aren't confessing) sets in the last 2 months!!? (wiggle eye-brows!! I'm sure you had a great birthday ST! LOL!)

Anyways, on a more serious note...... it's the exam month for the kids and my dear 16-yo son is sitting for his "O"s..... mama's gotta be more attentive.... I do get "lost" in my crafting sometimes... and I forget to NAG! 
AND my dear 10-yo is recovering from pneumonia......mama's trying to recover from hard beds provided by hospital for parent staying over to watch their kids! Ugh! 

All in all, it has been a rather worrisome time and would have been more difficult if not for the Lord's grace and keeping.... and the prayers of brothers and sisters in the Lord!! Thank you!

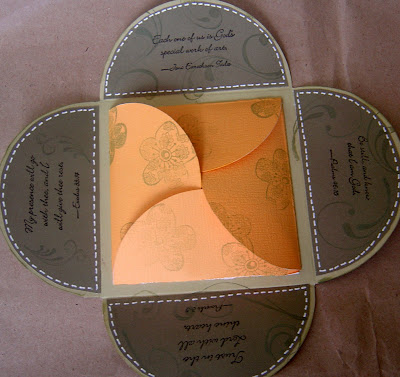
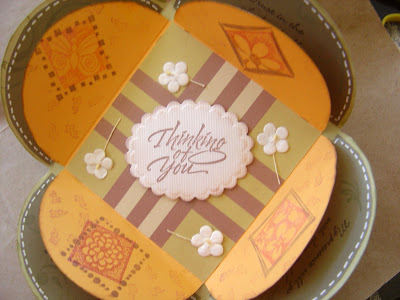
In the midst of all the above, I managed to make a card using one of my SU stamp set; In Full Bloom. This is a Double Pocket card that I learnt here.
The only thing is that you need to get scrapbook paper that is printed double-sided.... and those are a tad more costly. Another thing is to get prints that are repeated evenly throughout the paper.... those beautiful designs around the borders will be hidden (what a waste! as I found out) when the paper is folded a couple of times. I liked how my card turned out and I hope that my friend who ordered this project will like it too....

Friday, 19 September 2008


This card was inspired by a Stamping and Papercraft (Australia) magazine I had borrowed from the library. This card is made for the Cricut forum Handmade Card Swap that I'm part of. It's been fun getting cards from US and Canada. Thanks for looking!

YES MICHELLE, THIS IS THE CARD MEANT FOR YOU BUT WENT M.I.A. IN THE POST! **SOB**

Friday, 5 September 2008

GLOSSY ACCENTS!!


This stuff is really fun! I bought it recently at JDA (Junior De Artist). 
Once I used it, I got hooked and glossy accent-ed a lot of my newer cards! LOL! Everytha-ang is glossy and blinky!

Here's the Happy Hopper stamp I bought recently, called Seed Shooter. I thought the water 
melon looked more yummmy  after getting Gloss-Acceented (G-Aed).

Here's another card that's been G-Aed.


ENJOY!! I'll have more posted soon hopefully... I'm finally starting my daughter's scrapbook. Will try to post the progress......

AND
I HAVE A NEW TOY; 
Cricut's PAPER DOLL DRESS UP CARTRIDGE!
!!!! YA-HOO!!!!
(yeah.... andrew spoils me rotten ; p)

I know I'm a (ahem!) big (cough! cough!) girl now, but these dolls are so vv-eerry CUTE!!! hee!hee! Would have posted more of these, but have given some away......


Sunday, 27 July 2008

Wazz Up?


=


The Bind-It-All from Zutter is an awesome machine..... Here's the spate of  Mini Album projects that I churned out after I bought this machine from MWL when they were having a 25% discount.

It's super easy to use and projects turn out really neat and professional-looking. I  was so inspired by how great my first mini album turned out that I made all these in a week! These are gifts for friends and my Shalom Holiday School Art & Craft team members. They are mini family albums to showcase photos of their kids and hubby.... Now, I've made for so many my friends.... about time to start on my own....

I thinking of selling some of these as part of my efforts to boost my church's building fund.... Think anyone would buy?....... Hmmmmmm ....... I learnt something though..... never ask an engineering fellow to buy any crafty things.... better to go bang your head against a wall!!! LOL!!!

Saturday, 26 July 2008

NEW CARD; POP-UP CARD

I try to learn something new every week.... so this is what I came up with this week. It is surprising easy to make and SO interesting. While making this card, I realised that I'm REALLY numerically-challenged. Rattle off a series of numbers and you can be sure my eyes will have that glazed look and a switch in my brain auto-click OFF!! LOL!! I just.... ummm... cannot remember measurements, phone numbers, how much something cost, my weight.... hahahaha!!!
Ok, enjoy the short video clip I managed to make on the iMovie for the first time....

A BE-OO-TI-FUUUL! CARD!


Stamps from Stampin Up

 
Flower is a die-cut from BossKut- Daisy (so pretty!)

Awesome water-colouring!!!!

Hi y'all........... Just want to share with you a wonderful card my "SHI FU"(teacher) made me. I luv the way she coloured the flowers and crafted the card. SO NI--CEEEEE!!! A card to treasure....... Thanks FLO! (She does not have a blog yet..... we are still waiting......)

Monday, 14 July 2008

Valerie's Mini Album


Here it is! The cutest mini coaster album I made for Linda's daughter, Valerie. This is really something girlish-pinkish-ticklish! 
Each letter of her name is cut and embossed, then adhere to the page. The opposite page is suppose to hold her photos through the sixth year of her life.....
I don't know about you, but my first child had the most baby photos.... After the second and third child came along.... the photo-taking  shrank to the 3Cs; Child , Candle and Cake! 
My kids are always thrilled to look through their baby albums and peeked into their past.... I should take more photos and have them printed. These days, with digitalize memory storage, few of us really bother to print photos anymore.... I think we are missing some simple pleasures here... Andrew just handed me some old photos of my kids he had displayed in his office... time for an updated photo he said.... But as I looked at the photos.... my heart just "melted".... they looked so sweet!!! MMMMMMMM!.... and this was as I was fuming mad! (DS1's fault!.... long story...). 
I guess in some small ways, we want to hold on to the past ..... sometimes it feels like the kids grow up too fast and you wonder where the time went.... Sometimes I wish I could go back in time and just hold them as babies once again.... I suppose I'll just have to wait for the grandkids to make their appearance. Hopefully, I'll still be sound and sane for those simple pleasures.... God willing.... ;D


Friday, 4 July 2008

Altered Music Box


This project was at once fun and painful to do...... let me tell u my story......
It started when Linda wanted a special birthday gift for her niece (great aunt that she is!).... I racked my brains for something special I can do for a 4 year-old while trying to sleep at night (sure way to court insomnia!!!) The more I thought, the more excited I became and only fell asleep from sheer exhaustion at close to 4 am..... 
Next morning, wrote a e-mail to Linda and spent the rest of the day at Flo's, to help her with the scrap-booking of her daughter's trip to India, for her school.... scrapbooking is really cool(such a teen word, can't believe I using it, but can't think of a better word right now!LOL!!)

Day1:After getting the go ahead from Linda that night, I worked on it for 3 hours.... measuring, cutting, pasting, modge-podge-ing  so that it will be completely dry the next day.

Day2:Used Making Memories Acrylic paint;PLUM to paint the inside cover and bottom of the box twice, letting the first coat dry first, before applying the second coat. Leaving it to dry, I'm off to Spotlight to get a pretty box to package the gift and a glittery butterfly to embellish the box..... 

PLAZA SINGAPURA:::: the place that empties the purse..... 
First stop, third floor- Made With Love a.k.a. Local Scrapbooking Store. Lots of lovely stickers, scrapbking tools, papers.... I bought the Cutterpede mini (this is a need, no regrets so far... except that I realised after a while that the blade it comes with is REALLY blunt.... (whispers:  I think they want u to spent more to buy new blades :(( ....) Bought 2 Versacraft(new) cube inkpad .... can be used on Fabric!

Second stop, fifth floor- Spotlight. Bought my butterflies (so ex.... $3 for 1.... sigh.... should have stock up some when 20% sale is on). Their boxes were not the right type.... may have to make one.... Saw some great looking pearl embellishments....... bought some..... Refused to look at papers..... mustn't l@@k!!....mustn't l@@k!.......mustn't l@@k!!.... got out without buying any papers..... good girl, ME!!

Third stop, fourth floor- Daiso a.k.a. Japan $2 store. Right at the front of the store, sits the beeeeu-ti-fuuul box for my music box! Grab! Grab! Browse in the store for another half hour.... picked up 2 more clear plastic boxes..... Finally outta there!

LAST stop, B2- Bought 2 boxes of Takoyaki balls.... best in Singapore, according to Adric Pang! Gulped down 2 of them before getting onto the MRT home... starving.... hadn't had breakfast nor lunch.... too broke!!! LOL!

Day2, part 2: Glued ribbons to the 2 edges of the box. Painted the wooden name tag , leave to dry before lightly sand-papering it. 

DRAMA:It had been a long day..... that night I showed it (prettily papered and ribbon-ed) to DH and asked if he would buy something like it. DD (darling daughter) said "yes! It's so pretty". DH said " not even for a five (something like that!)"
OKKKKKieeee.... at this point I could let tears pool in my eyes as I turned my hurt gaze upon him... but he wasn't looking at me and it'll be all a waste of effort.... moreover I wasn't PMS-ing, so hard to get weepy at all!!
Boy! Ouch! Did that hurt? Yes. I quietly put the box away and went to bed. 

Day 3: No heart to do anything in the morning..... but I promised to hand it over the next day..sigh! I took it out of the box, set it on the table and went about my daily chores.... stop, stared, think.... (wipe away a tear or two...... haha! no la!) whenever I walked past the table....
Time to get encouragement.... Prayed over this.... logged on to my Cricut forum... read all the encouraging replies to one of my past projects I've posted there some time ago..... Told myself I could do this and make something special.... brought out all my good stuff! That box was going to get all the works and more!!
Cut out the name on my Cricut and "shadowed" it; double layer with a shadow around it. Letters are tiny, so had to work extra carefully. Adhered the letters carefully onto the painted tag and use Plaid's Royal Coat Antique Decoupage to go over the tag to seal it and prevent the name from damage. Lovvv-ely! Mwa-ah!

Inside cover looked rather plain... hmmm. Out came my Versamark ink and cute clear Studio G flower stamps...... stamped a flower background. The great thing about this ink is that it is colour-less and takes on the color of the medium you stamp on. So I got a darker shade of plum-coloured flowers as background.  After 2 hours... Uh-oh, it's not drying.... it does not dry easily on non-porous surfaces.... DIE!..... Ah-ha! Out came my fabulous Pebbles Pearlescent Colouring Chalk! Use a skinny paint brush to lightly brush over the stamped outline.... la-di-dahhhh! Wa-lah! Ze effect zis fabulo! Now ze zee z-it, now ze lon't! It's c--l! The flower background is obvious only at an angle when it is in direct light. Talk about making the most out of a mistake! Added on 2 small cream-coloured paper butterflies...... YUM!

Didn't look over-the-top yet! Glued on the cute pinky fibres I bought at Spotlight. Never used them before..... hee! hee! looks fluffy now.... feels sooo ticklish-ly-pink! Added, my all-the-way from Alaska, meadow-green SKITTLES to the bottom ribbon.... NIZE!

Almost done now..... flowers.... I promised Linda there would be flowers..... right on top...hmmm-hm! Now the shimmery butterfly.... looks LOVELY!! YES! IT DOES! 

BUT! Too delicate for a 4 yo to appreciate, I thought.

Off I go again to PS to quickly grab this light-up-blinking butterfly embellishment I saw at MWL earlier but thought it was too ex.... now I just had to get it. Surely a 4 yo would be entranced by the blinking lights at a press of a button! ~~~~ZIP THERE! ZIP BACK! ~~~~
PAnt! PAnt! Off goes the shimmer butt.... on goes the blinking butt.... haahaa! PUUURR---FECTO!!

FINALLY DONE...... THEN HEARD DD said "looks too busy (I'm starting to hate that word!)  leh, mom".  UUUUGH! Nope! I DID NOT hear that!
 
Punched hole at the side of the cover of the box to attach the ribbon to go around the box... stamped "Happy Birthday"  onto the clear plastic of the cover.... put everything into the box and smugly showed DH..... I NEVER learn, do I?!!! :<<
ME: What what do u think?
HIM: OK.... (ok? o-k! I wonder if u have to do time for strangling someone?hmmmm), but the metal punch in the box looks rather ugly (yes, zero in on the non-essentials....hurrmph!)
ME: nothing to say.... walked, head hanging, heart dragging on the haven't-swept-for-ages-bec-of-crafting   dusty floor, out the room..

HE-EY!! Wait a minute! Yeah, he's a "tough customer", but bec of that, it pushes me to do good, to do it such that no one can find fault with the goods.... He a knuckle-head sometimes (said with good humor; mine.... ; >), but I should take criticism in good spirits and train my "hide". 

So... line the box with my precious lace-pattered mulberry-like paper.... wrap up the "ugly" metal punch in another strip of lace paper.... sorry no photo.... at this point rather weary of it already.... Stuck in a free foam stamp I got with one of my purchases from US.... I'm sure Sharlene will have fun with that!

~~~~~~~~~~~~~~~~~~~~~~~~~~~~

Now work on the Coaster Booklet for Valerie; Linda's daughter...... the saga continues...... : )

Monday, 23 June 2008


">


KEZIAH. That's Dorcas' baby sista. She's getting the altered lunch pail I posted in March. Here's a updated pic of it. She looks absolutely precious in the pictures! I've not seen her yet, but I'll bet she'll look different by the time I clap me eyes on that wee one! LOL!!